

End of Tenancy Cleaning Blueprint: Tenant's Edition
Posted on 23/06/2025
Moving out of a rental property can be both exciting and daunting. One of the crucial tasks that stands between getting your deposit back and facing unwanted deductions is executing a thorough end of tenancy cleaning. In this comprehensive tenant's guide, we'll walk you through practical strategies, essential checklists, and expert tips for a stress-free end of tenancy cleaning experience. Whether you're a seasoned renter or a first-timer, follow this blueprint to ensure you leave your rental spotless--and your landlord happy!
Why Is End of Tenancy Cleaning So Important?
End of tenancy cleaning, sometimes referred to as move-out cleaning or rental exit cleaning, is a detailed cleaning process renters undertake before handing a property back to the landlord or letting agent. Why is this cleaning step so crucial?
- Secures Your Deposit: Cleaning up to the required standard minimizes the risk of deposit deductions.
- Meets Legal Obligations: Most tenancy agreements legally require tenants to return the property in a clean condition.
- Prevents Disputes: A spotless home leaves little room for disagreements with landlords or agents.
- Ensures Good References: A job well done can lead to favorable references for your next home hunt.
- Smooth Transition: The property becomes move-in ready for the next occupant quickly.
Pro Tip: Always review your tenancy agreement for any cleaning clauses or inventory checklists specific to your rental.

Understanding the End of Tenancy Cleaning Standard
Not all cleaning is the same--especially when you're moving out. End of tenancy cleaning should go beyond regular household cleaning. Landlords and agents often expect a deep clean, aiming to restore the property to its original state (minus reasonable wear and tear). This often includes:
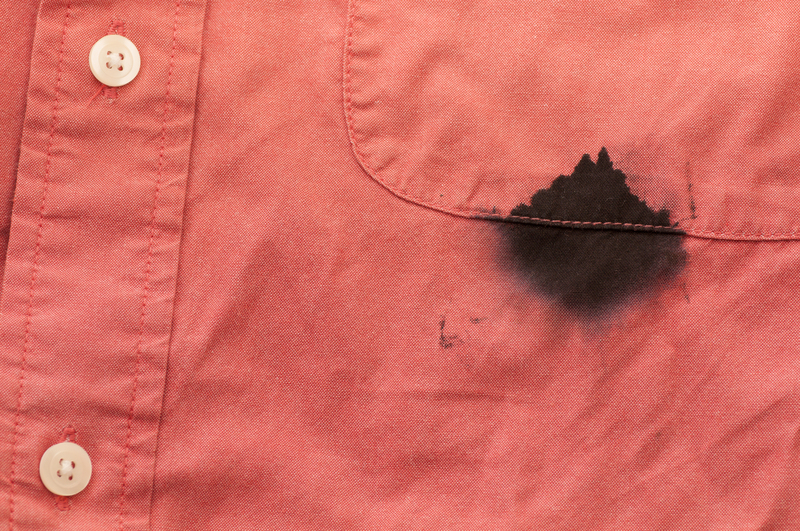
- Removing stains, grease, and limescale
- Deep cleaning carpets and hard floors
- Cleaning appliances, windows, and behind furniture
- Disinfecting bathrooms and kitchens
- Clearing out cupboards and drawers
DIY vs. Professional End of Tenancy Cleaning
Tenants frequently ask whether they should tackle end of tenancy cleaning themselves or hire a professional service. Here's how to decide:
- DIY Cleaning: Suitable for small properties or tenants with time and cleaning know-how. It's budget-friendly but requires effort, equipment, and attention to detail.
- Professional Cleaning: Recommended for larger homes, furnished flats, or when dealing with challenging stains. Most services provide a guarantee, covering you if agents or landlords aren't satisfied.
Tip: Some landlords insist on professional cleaning--always check your contract before booking or starting your own clean.
Ultimate End of Tenancy Cleaning Checklist for Tenants
Below is the essential end of tenancy cleaning checklist for tenants. Tick off each item to achieve a sparkling, inspection-ready property!
1. Living Room & Bedrooms
- Dust and wipe all surfaces, shelves, and skirting boards
- Clean inside and out of wardrobes, cupboards, and drawers
- Wipe down doors, light switches, and handles
- Launder or vacuum curtains and blinds
- Clean windows, frames, and sills (inside and out, if possible)
- Vacuum carpets and mop hard floors thoroughly
- Spot clean walls or touch up paint if allowed
2. Kitchen
- Oven and Stove: Degrease and clean inside/outside; remove racks and soak if needed
- Microwave, extractor hood, and fan: Deep clean and replace filters if required
- Fridge and freezer: Empty, defrost, and wipe down all surfaces
- Dishwasher: Run an empty hot wash cycle and clean filter
- Sinks, taps, and splashbacks: Remove any limescale, polish, and disinfect
- Cupboards and drawers: Empty, clean, and wipe both inside and out
- Counters and tiles: Degrease and disinfect thoroughly
- Floor: Sweep, mop, and pay special attention to corners
3. Bathroom(s)
- Bathtub, shower, and screens: Remove limescale, mould, and soap scum
- Toilets: Disinfect in and out, paying attention to hinges and flush lever
- Sinks and taps: Descale and polish until gleaming
- Mirrors and glass: Clean with streak-free products
- Tiles and grout: Clean and treat mildew or stains
- Storage units: Empty and wipe inside and out
- Floors: Wash thoroughly and disinfect
4. Hallways and Entrances
- Sweep and mop floors, vacuum carpets and mats
- Dust all skirting, corners, and lights
- Clean handles, switches, and door frames
- Wipe inside and outside of the front door
5. General Areas
- Empty all bins and remove rubbish from the property
- Clean windowsills, tracks, and frames
- Dust and wipe radiators, light fixtures, and bulbs
- Remove cobwebs from ceilings and corners
Remember: Document the cleaning with timestamped photos as proof in case of disputes.
Commonly Missed Spots in End of Tenancy Cleaning
Even the most diligent tenants may overlook certain problematic areas. Pay extra attention to these commonly missed areas in end of lease cleaning:
- Behind and under appliances (fridge, washing machine, cooker)
- Extractor fan covers and filters
- Air vents/smoke detectors
- Inside wardrobes, especially top shelves
- Lamp shades and ceiling fans
- Window tracks and patio door runners
- Grouting in showers and around sinks
- Backs of doors and high shelves
Essential Cleaning Supplies for Tenants
To carry out a comprehensive end of tenancy clean, you'll need the right cleaning products and tools. Stock up on the following:
- Multipurpose cleaner and surface disinfectants
- Degreasers for kitchen appliances
- Limescale remover (for bathrooms and taps)
- Antibacterial sprays and wipes
- Window cleaner or white vinegar and newspaper
- Carpet cleaner or vacuum with attachments
- Microfiber cloths, sponges, and scrubbing brushes
- Bucket, mop, dustpan, and broom
- Protective gloves and masks
- Bin bags and refuse sacks
Top tip: Use eco-friendly cleaning products wherever possible. This is often appreciated by landlords and safer for homes with children or pets.
How to Plan Your End of Tenancy Cleaning
Proper planning is essential to avoid a stressful last-minute rush. Here's a step-by-step approach for tenants:
- Read your tenancy agreement to check for cleaning expectations and possible penalties.
- Book your moving date and work backward to set a cleaning schedule.
- Declutter and remove personal belongings before starting the clean.
- Prioritize rooms: Start with least-used areas and end with high-traffic zones like kitchens and bathrooms.
- Use the checklist above, ticking each item off as you go.
- Take photos before and after cleaning for your records.
- Arrange an inspection with your landlord or agent and be present if possible.
Try to leave a day or two between your cleaning session and the inventory check to allow for any last-minute touch-ups!
Frequently Asked Questions on End of Tenancy Cleaning
1. How clean does my rental property need to be?
The property should be as clean as it was when you moved in, excluding fair wear and tear. Landlords expect a professional standard or close to it, including deep cleaning of appliances and hard-to-reach areas.
2. Do I need to use a professional end of tenancy cleaning company?
Not necessarily unless your tenancy agreement specifies it. However, landlords may require a receipt as proof of professional cleaning, especially for carpets or upholstery.
3. Can my landlord keep my deposit if the cleaning isn't satisfactory?
Yes, cleaning is one of the most common reasons for deposit deductions. If the property isn't cleaned to the required standard, the landlord can claim for professional cleaning costs from your deposit.
4. How long does an end of tenancy clean take?
It depends on the property's size and cleanliness. Generally, expect to spend a full day or more on a medium-sized flat, or longer for larger homes.
5. What should I do if I disagree with my landlord about cleaning?
Raise the issue with your letting agent, providing before and after photos. If unresolved, use your tenancy deposit protection scheme's dispute resolution service.
Top Mistakes to Avoid During End of Tenancy Cleaning
- Leaving it until the last minute: Rushed jobs often lead to missed spots and potential disputes.
- Ignoring your tenancy agreement: Some stipulate professional carpet, upholstery, or curtain cleaning.
- Forgetting to document your clean: Photos are vital in the event of disagreements.
- Thinking surface cleaning is enough: Deep cleaning is almost always expected.
- Missing external areas: Balconies, porches, and garages may also be inspected.
End of Tenancy Cleaning: Tenant's Final Steps
- Conduct a final walkthrough of each room with the checklist in hand.
- Empty all bins and remove leftover food and rubbish from the property.
- Switch off and unplug appliances, leaving them open (especially fridges/freezers to prevent mold).
- Return keys and secure the property as instructed by your landlord or agent.
- Attend the check-out inspection and be polite--even if disputes arise.
Conclusion: Leave in Style & Secure Your Deposit
Following a thorough end of tenancy cleaning blueprint is the tenant's best defense against costly deposit deductions and unnecessary disputes. By planning ahead, using comprehensive checklists, and addressing hidden cleaning tasks, you'll not only secure your return but also leave a positive impression for future rentals.
Remember: Good cleaning is an investment in your rental reputation. Whether you handle it DIY or call in the professionals, always strive for a sparkling exit!
If you found this tenant's edition guide helpful, share it with fellow renters or bookmark it for your next move. For detailed cleaning checklists, product recommendations, and more expert moving tips, stay tuned to our blog!